
2026-08-16
How to Launch Your Own Branded Online Course Platform in Under a Week
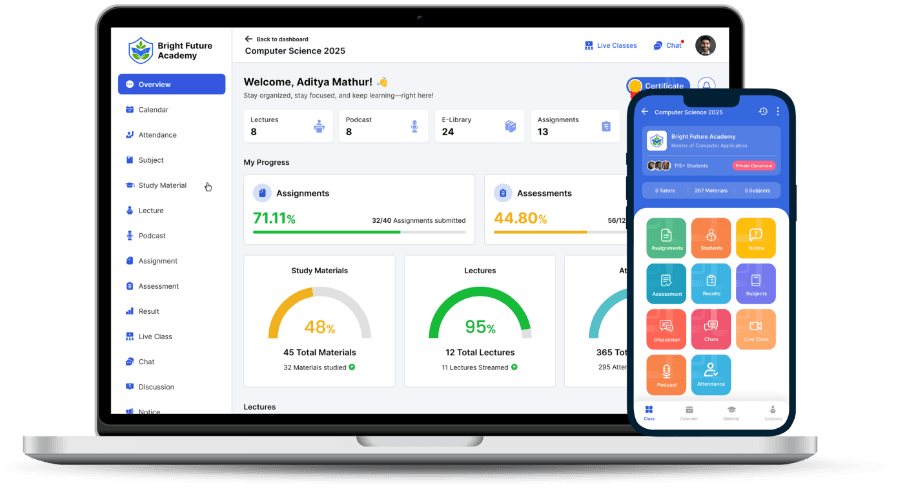
"Go live in 3-5 days" sounds like a marketing line until you see what actually happens in those days. This post breaks the claim down into its real, concrete steps: what an institute does each day, what the platform handles automatically, and what determines whether you land closer to day 3 or day 5. No vague promises, just the actual sequence of a launch.
Why This Is Possible at All
A from-scratch custom-built course platform takes 6-12 months of development before an institute can accept its first paying student. That timeline exists because you'd be building the LMS itself, from video hosting and payment processing to assessment engines and mobile apps, from zero. A managed, white-label platform inverts that: the software already exists and is already running. Launching your institute on it isn't a software project, it's a configuration and content project. That's the entire reason days replace months.
The Week, Day by Day
Day 1: Account, Address, and Branding Foundation
The first day is about establishing your institute's identity on the platform. Your institute account is set up, your institute gets its own address on the platform (yourinstitute.theacademix.com), and you upload your logo, brand colors, and institute details. This is also when guided onboarding starts: a real person walks you through the setup rather than leaving you with a knowledge base article.
- Get your institute account set up
- Confirm your institute's theacademix.com address
- Upload logo, set brand colors, add institute name and details
- Kick off guided onboarding with the platform's support team
Day 2: Build Your Public Storefront
With branding in place, day two is spent on the public-facing website prospective students see before they ever create an account. Using a drag-and-drop website builder, you assemble a hero section, an about page, instructor bios, testimonials, and an FAQ section, with no developer or designer required. By the end of the day, a stranger landing on your storefront sees a complete, professional institute website, not a generic template with your logo pasted on top.
- Hero section introducing your institute and its courses
- About page and instructor bios
- Testimonials section
- FAQ page answering common admissions and course questions
Day 3: Load Your Courses and Content
This is typically the longest single day, because it's where your actual academic content goes in: courses, subjects, lecture programmes, video lectures, PDFs, and other study material. Institutes moving off an existing system (a spreadsheet-and-WhatsApp setup, or another LMS) start bulk content migration here; institutes starting fresh build their course structure directly. Question banks and assessments (mock tests, quizzes, assignments) are set up in parallel, since these are core to how coaching institutes actually operate day-to-day.
- Create course and subject structure
- Upload video lectures, PDFs, and other resource library content
- Build out the question bank and assessment templates
- Begin bulk content migration if moving from an existing system
Day 4: Payments and Live Classes
Day four connects the operational plumbing: how you get paid and how you teach live. On the payment side, this means setting up Razorpay checkout so students can buy courses on your storefront. On the teaching side, you pick your live-class tool of choice, Google Meet (a one-time Google connection) or your own BigBlueButton server, rather than being forced onto whichever one the platform vendor happens to prefer.
- Set up Razorpay checkout for course purchases
- Choose and connect your live-class tool: BigBlueButton or Google Meet
- Set course pricing and enrollment rules
Day 5: Staff Roles, the Mobile App, and Go-Live
The final day is about people and polish. You set up role-based permissions for tutors and staff, add your team, and confirm that students who sign in to The Academix app on Android or iOS see your institute's name and logo. Then it's a final walkthrough, testing enrollment, a mock test end to end, a live-class session, and a payment, before flipping the switch to public.
- Set up tutor and staff accounts with role-based permissions
- Confirm your branding inside The Academix app
- Run an end-to-end test: enrollment, mock test, live class, payment
- Go live
What Determines Day 3 vs. Day 5
The 3-5 day range isn't padding. It reflects real variance in how prepared an institute is walking in. The biggest factors:
- How much content is ready to upload on day 3 vs. how much still needs to be created from scratch
- Whether your logo, brand colors, and storefront copy are ready, or still being written
- How many staff and tutor accounts need individual setup and training
- Whether you're migrating an existing question bank and video library, or starting fresh
An institute with its course content, logo, and storefront copy already in hand can realistically land on day 3. An institute starting from a blank slate on content will land closer to day 5, which is still an order of magnitude faster than a custom build.
What Comes After Go-Live
Going live on day 3-5 doesn't mean everything is finished. It means students can enroll, pay, attend classes, and take assessments. Full implementation, including deeper content migration for institutes with large existing libraries, typically completes within 2-3 weeks. That's a deliberate distinction: the platform is fully usable from launch day, while the long tail of historical content gets migrated in the background without blocking students from using the system.
The Bottom Line
Launching a branded online course platform in under a week is achievable specifically because you're not building software; you're configuring an existing, fully managed platform under your institute's name and brand. Account and branding on day 1, storefront on day 2, content on day 3, payments and live classes on day 4, staff and go-live on day 5. If your content and branding are ready before you start, you can move even faster.
Related articles
- The Global Classroom Revolution: How Digital Platforms Are Breaking Educational Borders
- The Digital Education Business Model: Why Educators Are Earning 10x More Teaching Online in 2025
- Why Top Online Educators Struggle Without an LMS: The Hidden Cost of Teaching Without Structure